
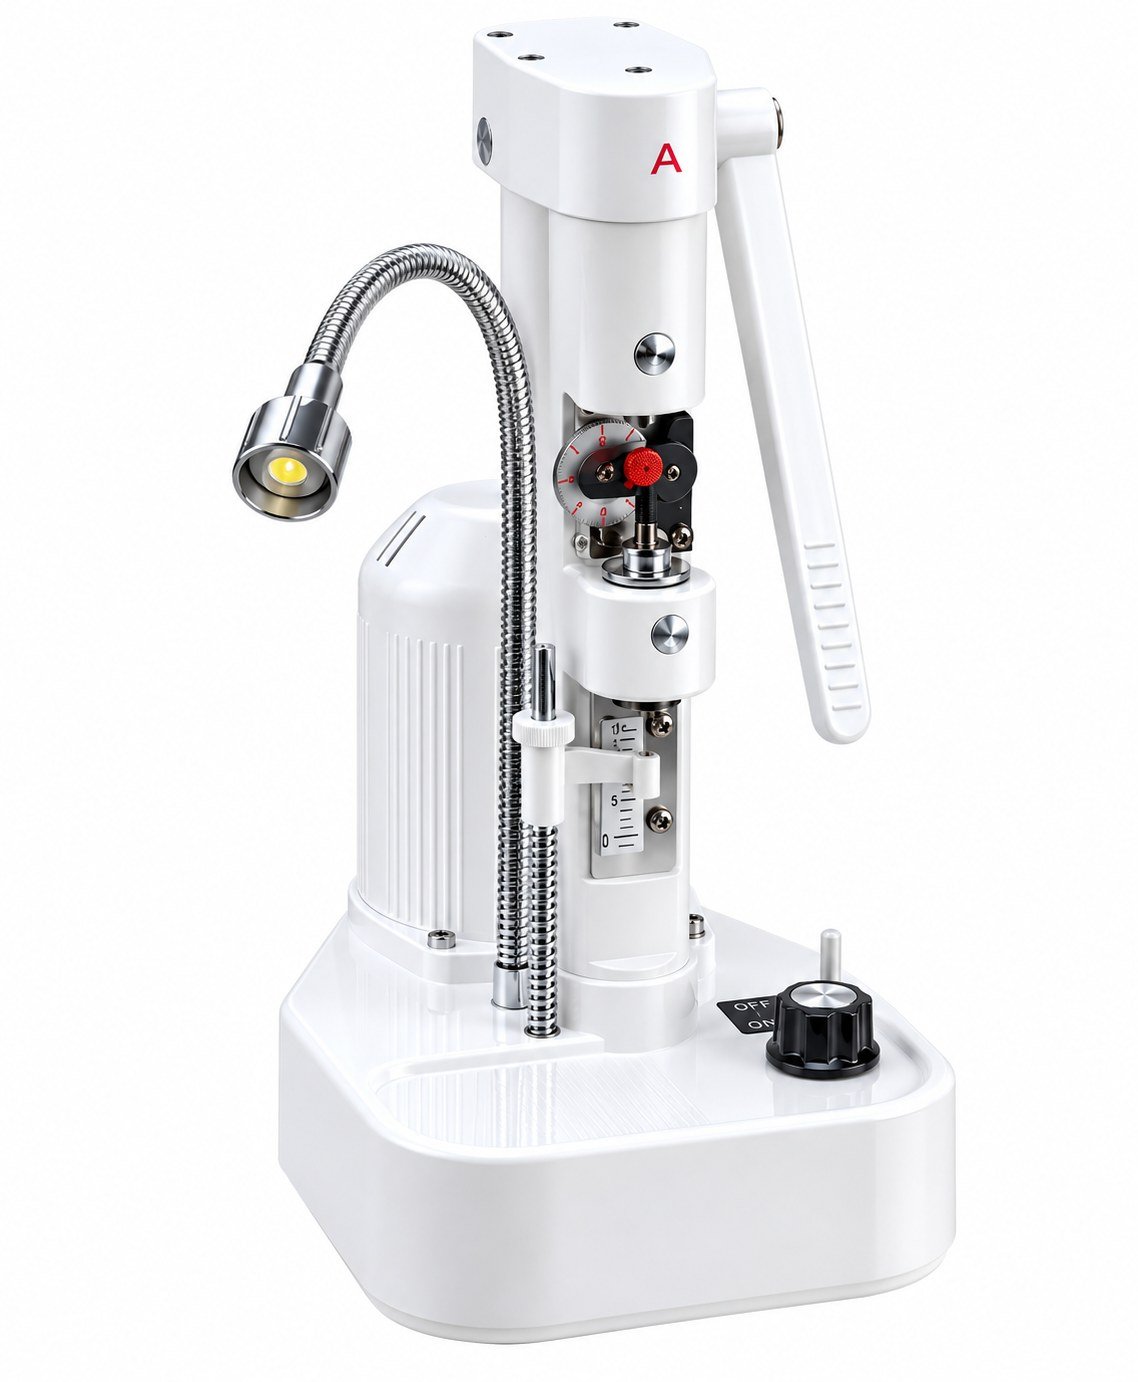
CP-2A Lens drill for rimless eyeglasses
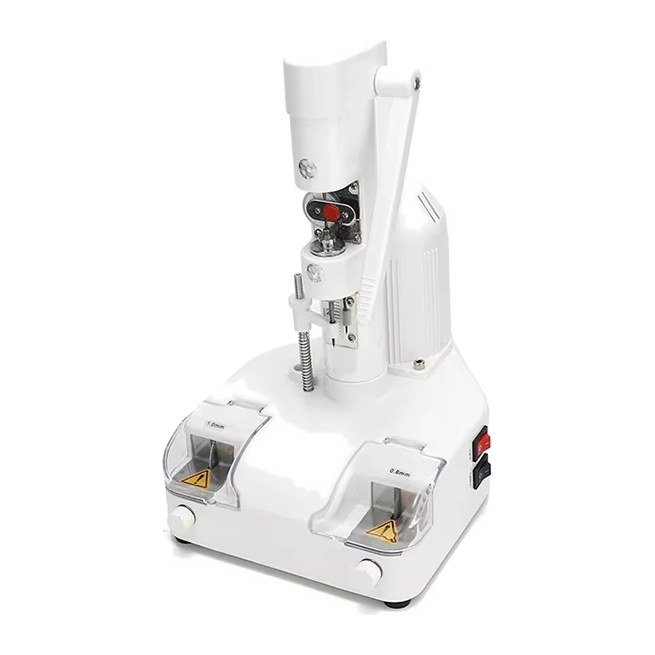
A speed-adjustable lens drill for the holes in rimless (drill-mount) lenses, in CR-39, polycarbonate and glass. Opposing taper bits drill from both sides at once, so the hole lines up and does not chip; a reamer then opens it to size. With a flexible LED lamp, 40 W, 3 kg.
Delivery, packing and documents
What the CP-2A does
Rimless drilling
Drills the holes for the screws or bushings of drill-mount frames, in CR-39, polycarbonate and glass lenses.
Opposing taper bits
Two bits drill from both sides of the lens at the same time, for an accurately placed hole without chipping, which matters most on glass.
Built-in reamer
Lift the drilled lens up against the reamer to open the hole to the size the mount needs.
Adjustable speed
Slow the bit down for polycarbonate and speed it up for other materials.
LED lamp
A flexible LED lamp lights the drilling point.
Pairs with a slotting machine
For mounts that clamp into edge notches, add the CP-24A, which drills and slots.
A closer look at the CP-2A
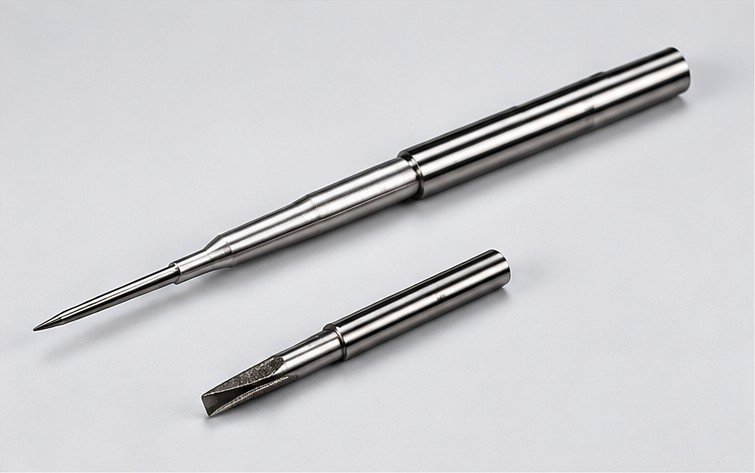
Opposing taper drill bits
Two taper bits drill the hole from both sides of the lens at once, so it lines up exactly and does not chip where the bit breaks through.
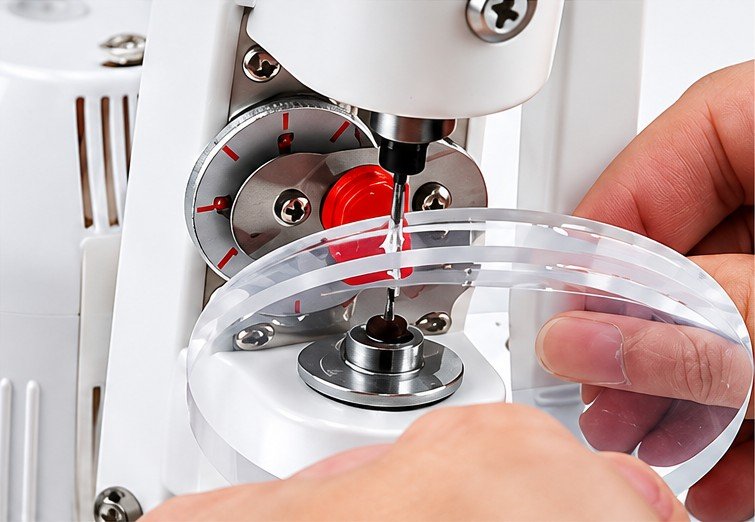
Drill, then ream
After the hole is drilled, place the lens under the reamer and lift it upwards to open the hole to the size the mount needs.
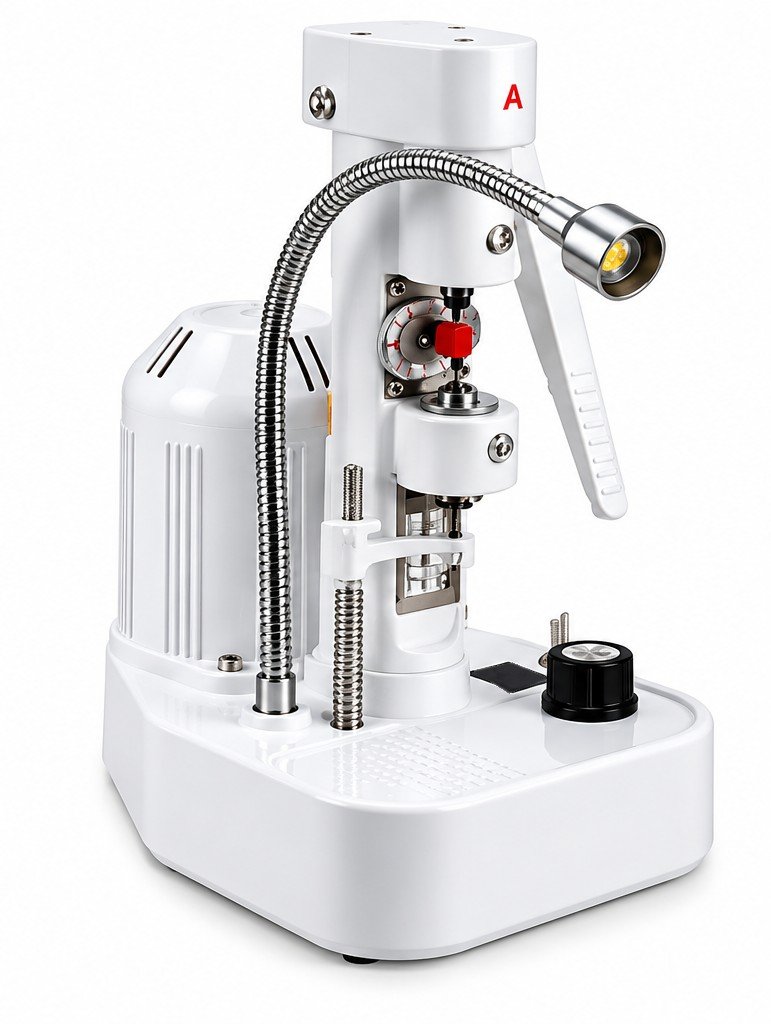
Lamp and controls
A flexible LED lamp lights the drilling point; the knob on the base sets the speed.
CP-2A in figures
Published specifications. Anything not listed here is confirmed in writing on your quotation, never estimated.
Export voltages are made to order. The CP-2B is the same drill with a flat lens support platform instead of the lamp.
CP-2A
- Voltage
- AC 220 V / 50 Hz or 110 V / 60 Hz
- Power
- 40 W
- Weight
- 3 kg
- Dimensions (L × W × H)
- 250 × 200 × 330 mm
- Drilling
- Opposing taper bits, both sides at once
- Hole sizing
- Reamer
- Lens materials
- CR-39, polycarbonate, glass
- Speed
- Adjustable
- Lamp
- Flexible LED
Versions
| Model | Difference |
|---|---|
| CP-2A | Flexible LED lamp |
| CP-2B | Flat lens support platform instead of the lamp |
Good rimless drilling practice
How it works
A lens drill makes the holes a rimless (drill-mount) frame is screwed through. The simplest method copies the holes from the frame’s demo lens: lay the demo lens on the edged lens, mark the positions and drill.
Speed control is the feature to look for. Polycarbonate softens with heat, so trade guides advise drilling it at about half speed, in shallow passes with pauses to cool, and with light pressure. Harder materials can run faster.
Most drilled-lens failures start at the hole. Chamfering both sides of each hole, fitting bushings or washers so metal never presses on the lens, and keeping acetone and thread-lock away from the mount prevent the majority of star cracks.
Check before you order
- Speed control (the CP-2A has it) for polycarbonate work.
- How the hole is drilled: drilling from both sides, as the CP-2A does, avoids breakout chips on glass.
- A light over the drilling point, or a lens support platform (CP-2B).
- A supply of sharp bits in the sizes your frames use.
- Whether you also need slots for notch-type mounts (then consider the CP-24A).
Good practice
- Edge the lens to the demo lens shape and check the fit first.
- Mark the hole positions from the demo lens.
- Drill with a sharp bit at the right speed for the material.
- Chamfer both sides of every hole.
- Fit bushings or washers, and trim compression sleeves with a sleeve trimmer rather than cutting pliers.
- Inspect for micro-cracks before the glasses leave the bench.
Care and maintenance
- Replace bits when dull; inspect them under magnification.
- Keep the chuck and seat post clean of lens dust.
- Store bits dry and sorted by size.
Background sources: Eight tips for processing rimless or semi-rimless eyewear (Eyecare Business) · The art and science of rimless eyewear, part 1 (TTUHSC, ABO-NCLE course) · Edging poly: a troubleshooting guide (Eyecare Business)
Often ordered with the CP-2A
CP-2A questions
What is the difference between the CP-2A and CP-2B?
They share one parameter table. The CP-2A is shown with a flexible LED lamp; the CP-2B has a flat lens support platform instead.
Can the CP-2A cut notches?
No, it drills and reams holes. For slots and notches, use the CP-24A drilling and slotting machine.
Can it drill glass lenses?
Yes. The opposing taper bits drill from both sides at once, which avoids the chipping that breaks glass lenses.
How fast should I drill polycarbonate?
Trade guides recommend about half speed, shallow passes of roughly 0.5 mm with pauses to cool, and light pressure.
Which tools do I need for rimless mounting?
Besides the drill: rimless pliers, a sleeve trimmer and a set of optical screwdrivers. See the rimless plier kits on our Tools & Spare Parts page.