
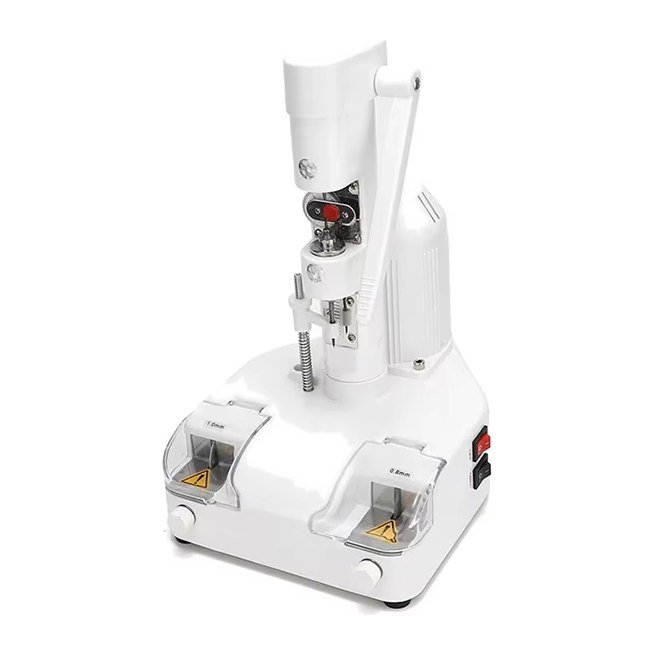
CP-24A Lens drilling and slotting machine for rimless eyewear
A bench machine for drilling and notching (slotting) rimless lenses. Opposing taper drill bits drill each hole from both faces of the lens, a reamer opens the hole to size, and an adjustable groove cutter sets the notch depth. With speed control, an aluminum riser, and an LED lamp or a handle as you choose. For CR-39 (resin) and PC lenses.
Delivery, packing and documents
What the CP-24A does
Opposing taper drills
Upper and lower taper drill bits are aligned on one axis, so each hole is drilled from both faces of the lens at the same point. This reduces chipping where the drill would otherwise break through.
Reamer
After drilling, lift the lens onto the reamer to open the hole to the size the mount needs.
Adjustable notch depth
The groove-cutting device is adjustable, so notches are cut to a consistent depth. Two covered cutter stations are marked 1.0 mm and 0.8 mm.
Speed control
Slow the drill down for polycarbonate, which softens and smears at high speed.
Aluminum riser
The drilling head is carried on an aluminum pipe riser.
LED lamp or handle
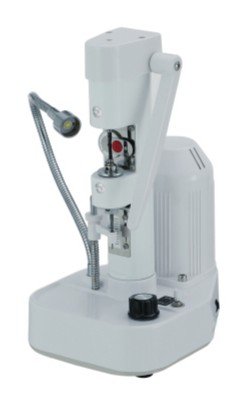
Supplied with an LED lamp or a handle, as you choose.
CP-24A in figures
Published specifications. Anything not listed here is confirmed in writing on your quotation, never estimated.
Voltage and power are CP-24 series figures and are confirmed on your quotation.
CP-24A
- Functions
- Drilling, reaming and notching
- Drilling
- Opposing upper and lower taper drill bits
- Hole sizing
- Reamer
- Notch depth
- Adjustable
- Slotting stations
- Two, marked 1.0 mm and 0.8 mm
- Speed
- Adjustable
- Lenses
- CR-39 (resin), PC
- Fittings
- Aluminum riser; LED lamp or handle
- Dimensions (W × D × H)
- 180 × 225 × 300 mm
- Net weight
- 2.37 kg
- Carton
- 255 × 230 × 355 mm
- Packed weight
- 2.84 kg
CP-24 series
- Voltage
- AC 220 V / 50 Hz, 110 V / 60 Hz
- Power
- 20 W
Versions
| Model | Difference |
|---|---|
| CP-24A | Speed control, aluminum riser, with LED light or lens rest |
| CP-24B | Aluminum riser, with LED light or lens rest |
| CP-24C | Standard plastic standpipe |
Drilling rimless lenses that last
How it works
In a drill mount, the bridge and temples fix directly to the lens through drilled holes or edge notches, using screws and nuts or compression and tension fasteners. Drilling comes after the lens is edged, usually to the shape of the frame’s demo lens.
On the CP-24A the edged lens is positioned at the hole marked from the demo lens, and upper and lower taper drill bits meet at that point, so the hole is drilled from both faces. Drilling from both sides avoids the chipped exit a single drill leaves. The lens is then lifted onto the reamer to open the hole to the mount’s size, and notches are cut at the groove-cutting station to a set depth. Speed control matters because polycarbonate should be drilled slowly, with pauses to cool.
Lens material decides how well a drilled lens holds up. Trade sources rank Trivex first and polycarbonate second, because they resist cracking around the holes. Standard CR-39 and glass chip and crack more easily. High-index is debated: some grades have good tensile strength, but trainers still treat Trivex as the safe default.
Check before you order
- Hole and slot positions: a way to copy the demo lens accurately.
- Speed control for polycarbonate (the CP-24A has it; the CP-24B and CP-24C do not list it).
- Light and lens support: LED light or lens rest.
- Bits and cutters you will need to reorder, and how you will source them.
- Clamping that will not mark coated lenses.
Good practice
- Edge the lens to the demo lens shape, not to a full-frame tracing.
- Keep enough edge thickness at the holes: at least 1.5 mm on plus lenses, and preferably 2.0–2.2 mm.
- Drill with a sharp bit; on polycarbonate, drill at about half speed in shallow passes with light pressure.
- Chamfer each hole lightly on both surfaces. This is the single most cited way to prevent cracks.
- Fit bushings or washers so metal never presses directly on the lens.
- Inspect for micro-cracks around the holes and check that both lenses match.
Care and maintenance
- Inspect bits under magnification and replace them when dull; dull bits cause heat and star cracks.
- Replace clamp pads as they wear so they do not mark lenses.
- Keep acetone, thread-lock and solvent cleaners away from drilled lenses; they cause star cracks.
Background sources: A simpler view of rimless eyewear (Review of Ophthalmology) · Rimless and wrap (20/20 Magazine) · The art and science of rimless eyewear, part 1 (TTUHSC, ABO-NCLE course)
Often ordered with the CP-24A
CP-24A questions
What is the difference between the CP-24A, CP-24B and CP-24C?
The CP-24A has speed control, an aluminum riser and an LED light or lens rest. The CP-24B has the aluminum riser and light or lens rest without speed control. The CP-24C has a standard plastic standpipe.
Which lens material is best for rimless drill mounts?
Trivex first, then polycarbonate. Standard CR-39 and glass tend to chip at the holes, and high-index needs extra care.
Why do drilled lenses develop star cracks?
Common causes are dull bits, too much speed, holes that were not chamfered and missing bushings in the lab, and acetone or thread-lock at the dispensing table.
CP-24A or CP-2A?
Both drill rimless lenses with adjustable speed. The CP-24A adds opposing drill bits, a reamer and an adjustable notch cutter for mounts that need slots.
Can it drill glass lenses?
It is made for CR-39 and PC lenses. Drilled glass lenses generally cannot pass drop-ball impact testing, so we do not recommend glass for drill mounts.